- What are the common causes of file loss or failure on Windows Server 2008?
- Restore files from the Recycle Bin Windows Server 2008
- Use file recovery software
- Recover Windows Server 2008 system files
- Recover damaged files
- Recover file associations
- Recover DLL files Windows Server 2008
- Reinstall your Windows operating system
When a Windows Server 2008 file is deleted, it doesn’t disappear from the hard disk - it can be restored from the Recycle Bin. Even if it is permanently deleted from the Recycle Bin, it can still be recovered. In Windows, files never disappear; the space they take up on the hard disk (or any other media) is only marked as free for writing new data there.
What are the common causes of file loss or failure on Windows Server 2008?
There are several common causes of file loss or failure on Windows Server 2008, including:
- Hardware failure: This can include issues with the server's hard drive, memory, or other components that can result in data loss.
- Software corruption: Problems with the server's operating system or applications can lead to file corruption or loss.
- Human error: Accidentally deleting files, formatting the wrong drive, or making other mistakes can result in data loss.
- Malware or viruses: Attacks from malicious software can corrupt or delete files on the server.
- Power outages or surges: Sudden power failures or electrical surges can cause data loss if the server is not properly protected.
- Natural disasters: Events such as fires, floods, or earthquakes can damage the server and lead to file loss.
- Network issues: Problems with the server's network connection or storage area network (SAN) can result in data loss.
- Software bugs: Errors or glitches in the server's software can cause files to become inaccessible or corrupt.
Restore files from the Recycle Bin Windows Server 2008

How to Recover Files and Folders After Sending Them to the Recycle Bin and Deleting? (Windows 11)
Are you looking for how to restore files from the Recycle Bin?
Just do the following:
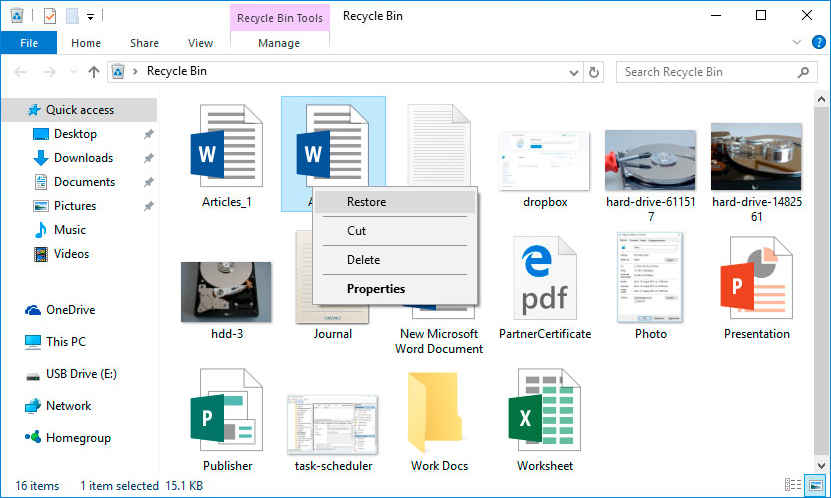
Go to the Recycle Bin on your desktop;
-
Find the file or folder which you need to restore;
Right-click on the required element and select Restore in the context menu.
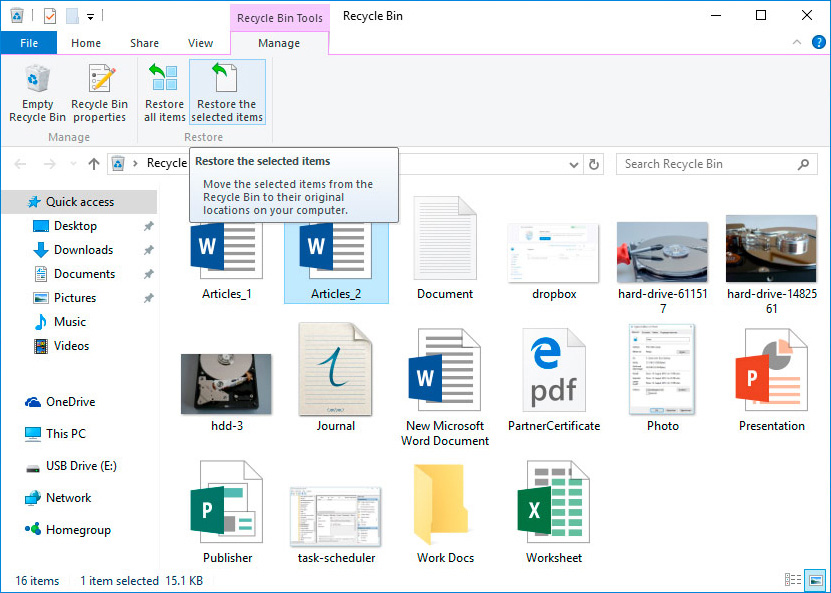
An alternative variant: Select the files or folders which you need to restore and click on the corresponding function in the Recycle Bin menu: find it in the tab Manage / Restore the selected items.

How to Recover Files Deleted From Windows Recycle Bin or With Shift + Del
Use file recovery software
Are you looking for how to restore files which were deleted without using the Recycle Bin?
Are you looking for how to restore files which were deleted without using the Recycle Bin? If files were deleted with a key combination Shift + Delete and it is impossible to recover them using standard tools of your operating system, the most effective way will be to use Hetman Partition Recovery.
For this purpose, do the following:
-
Download the program, install and launch it. Learn about the program functions and step-by-step guide.
-
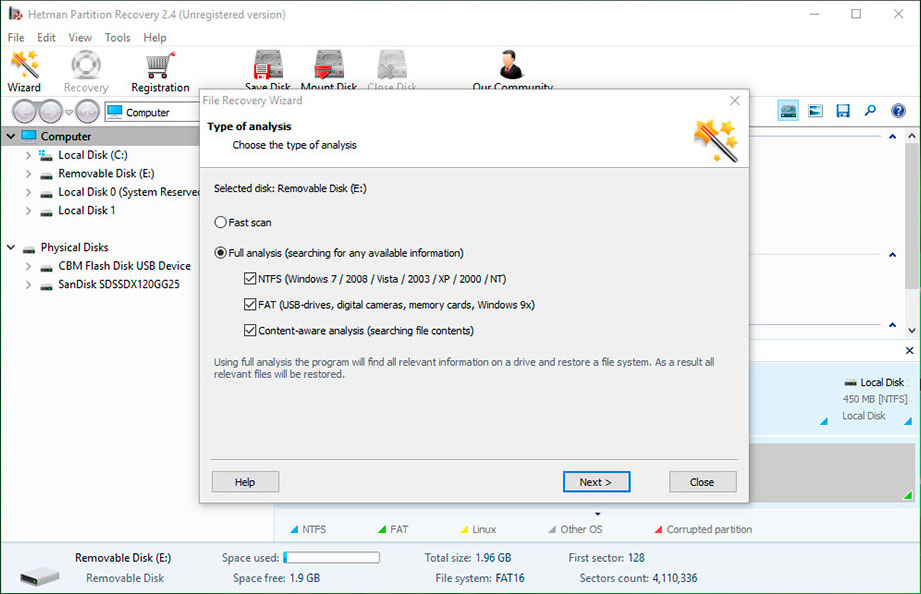
By default, users are suggested to start with File Recovery Wizard. Click «Next», and the program will ask you to select the disk you want to recover your files from.
Partition Recovery™ 5.1The tool recovers data from any devices, regardless of the cause of data loss.Download -
Double-click on the disk and select analysis type. Choose «Full analysis» and wait for the disk scanning process to finish.
-
When the scanning is over, you will be shown files for recovery. Select the ones you need and click «Recover».
-
Select one of the options to save files. Do not save the recovered files to the disk from where they have been deleted previously because they can be erased.

How to Recover Deleted Files With Hetman Partition Recovery Software
Recover Windows Server 2008 system files
How to recover Windows system files?
You may need to recover system files Windows Server 2008 if they were damaged or deleted. It can happen because of their incorrect use by the operating system, because of hardware failures or system errors, as well as because of malware activity.
Launch the tool for checking system files sfc /scannow
With the help of this command, you can restore system files in case your Windows is operable and boots all right.
For this purpose, do the following:
Launch the Command prompt as Administrator.
-
In the Command prompt window type in the command sfc /scannow and press Enter.

When the command is executed, it will find and restore system files. For the changes to take place, you will have to restart Windows.

How to Recover Windows 10, 8, 7 System Files (SFC, DISM)
Launch Windows Recovery Environment
If the operating system becomes inoperable and won’t boot because system files were damaged, you can recover them by using Windows Recovery Environment.
You can launch it like this:
By pressing F8 when the computer starts.
With the help of a boot disk (or boot USB drive).
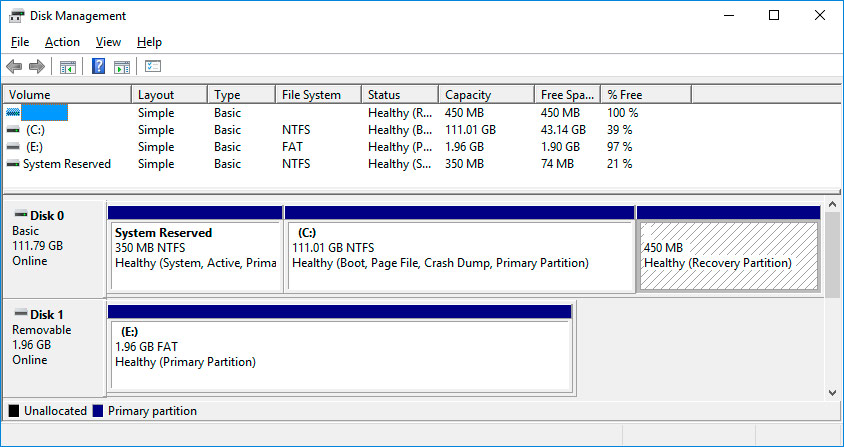
Note. The first variant is only possible if a boot partition was created during installation of the operating system. The system creates this partition for recovery purposes, and its size may vary from 100 Mb to 350 Mb and 450 Mb depending on the system.
Having launched Windows Recovery Environment, select System Restore or Troubleshooting. Names of the menu items may differ depending on the version of the operating system and the way Windows Recovery Environment is launched.
Recover damaged files
How to recover damaged Windows Server 2008 files?
Integrity of Windows can be damaged as a result of incorrect work with them, frequent reinstallation of software or overwriting of data.
Other factors leading to damage can be hardware failures (for example, bad sectors on the hard disk), software failures or viruses.
You can recover damaged files:
With the help of the command DISM (this command should be used if the system file source storage is damaged and Windows files cannot be restored with the help of sfc /scannow).
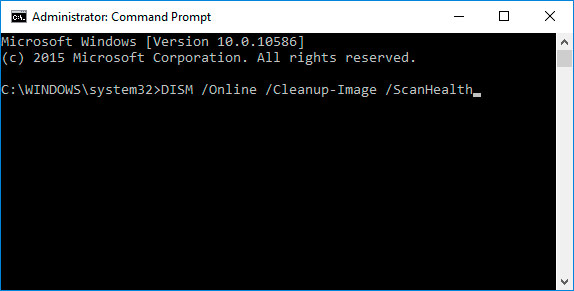
For this purpose, do the following:
-
Launch the Command prompt as Administrator and enter the command to check the source image for damage:
DISM /Online /Cleanup-Image /ScanHealth -
If the command finds any damage, launch this command to repair them:
DISM /Online /Cleanup-Image /RestoreHealth -
Run the command sfc /scannow again and restart the system.
If, for some reason, your attempt at recpvering Windows files failed, then you can recover them by complete reinstallation of the operating system.
Recover file associations
How to return file associations in the Windows?
File associations suggest comparing the file type to the program which will execute this file. Due to failures or Windows errors, such associations may be disrupted.
It may look like this: when you try to run a program, the computer opens a browser or Notepad instead of that program.
The solution is to restore file associations for the files which encounter this problem.

How to Recover Desktop Shortcuts and Set Default File Associations in Windows 10
To recover file associations:
-
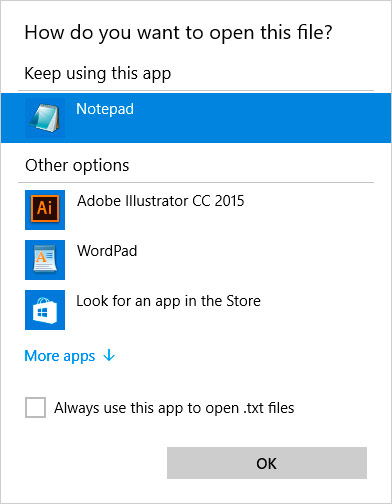
Use the menu item «Open with». Right-click on the file, the association for which needs to be changed. From the list of suggested programs, select the application that suits your needs or look for another one.
-
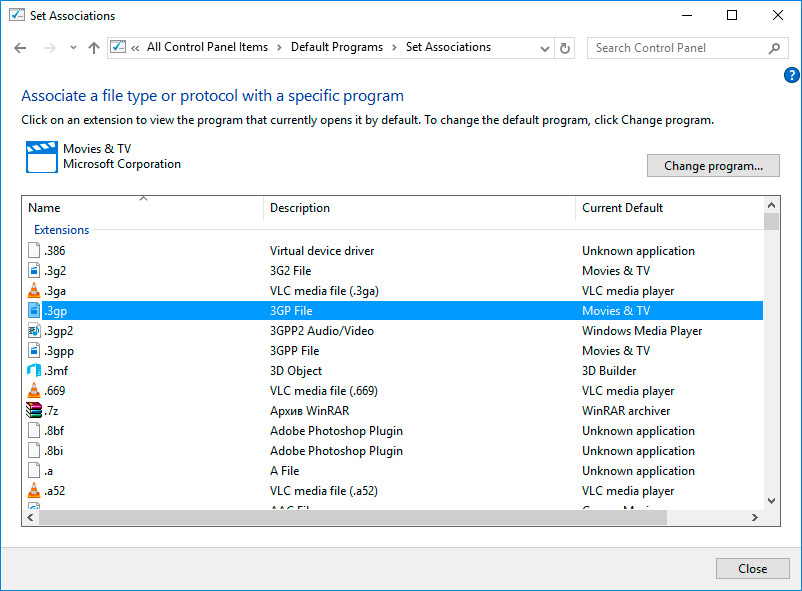
Launch Control Panel / Default programs / Set associations. To see which program opens this file type by default, click on the corresponding file extension. To change the default program, click on «Change program».
-
Launch Settings / System / Default applications. At the bottom of the window that opens, select Choose default apps by file type.

The methods described above are good when you deal with ordinary files (pictures, documents or videos).
If folder, shortcut or exe.file associations are disrupted, do the following:
-
Restart the computer and press F8 before the operating system boots. In the menu that appears, select Safe mode with command prompt. Set file associations by using the following commands: assoc.exe = exefile; assoc.lnk= lnkfile; assoc.bat = batfile.
Go to view
-
Open Registry Editor. To do it, Win + R and type in the command regedit. Find and delete UserChoice section in the tree
HKEY_CURRENT_USER\Software\Microsoft\Windows\CurrentVersion\Explorer\FileExts\.lnk\OpenWithList(it is shown as an example for .lnk files)

After that restart the computer and associations for this file type will be back to normal.
Recover DLL files Windows Server 2008
Our tips for recovering DLL files
By themselves, DLL files are not executable files but other programs use them in their work. Here are some of the possible causes for DLL files to be damaged, deleted or develop errors:
Deleting DLL files unintentionally.
Overwriting DLL files.
Effects of viruses or malware.
Damage to the hard disk.
Absent or damaged hardware drivers.
In Windows, there are incompatible file versions which belong to different applications.

How to Recover Windows 10, 8, 7 System Files (SFC, DISM)
To recover DLL files:
Find and copy the required DLL file from another computer or an installation disk. There are also DLL archives on the Internet where you can search for the necessary DLL file configuration.
-
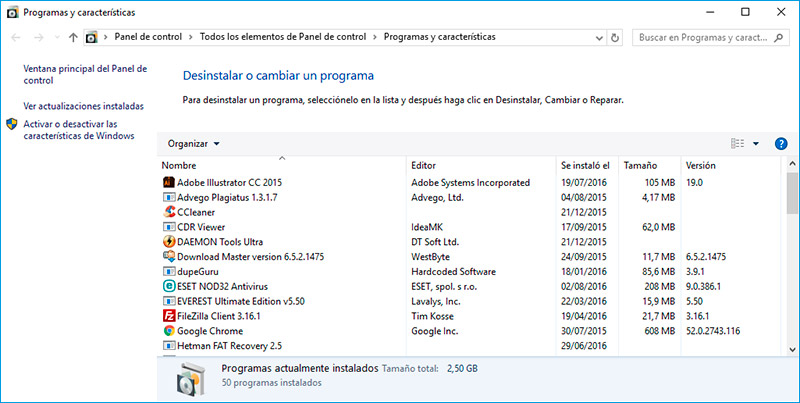
Reinstall the program referring to the DLL file. A DLL file error may be caused by an error in the work of the application that uses it.
-
Update the driver for the device which generates a DLL file error.

-
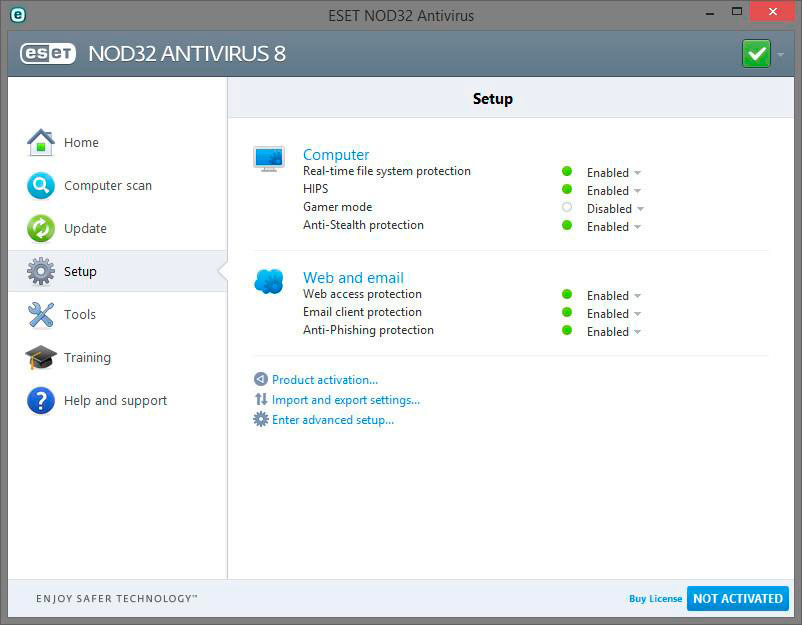
Scan the computer for viruses. Some malware can disguise as a DLL file and cause system errors.
 Go to view
How to Clean Your Computer or Laptop with Windows 10, 8 or 7 From Viruses for Free
Restore the system back to the last good configuration. Launch the Run window with the key combination Windows + R and type in the command: rstrui.exe

In the System Restore Wizard window that opens select the required system restore point with the date preceding the date when you encountered DLL errors.

Reinstall your Windows operating system
How to reinstall Windows?
If none of the described methods proved efective, you can still completely restore your system operability by reinstalling Windows.
To make a clean installation of Windows, you need to create a boot disk or another media, from which the operating system will be installed.
Boot the computer from the boot disk. To do it properly, you may need to change the boot sequence in BIOS or UEFI, in case of modern computers.
Follow the installer menu items and specify the disk where you want to install Windows. For this purpose, you will have to format it. If you are not happy with the number or volume of local disks, you can delete them entirely and then reallocate the space again.
Remember that formatting, deleting or reallocating disks will delete all files from the hard disk.
After you have specified the disk for installation of Windows, the process of copying system files and installing the operating system will begin. During the installation, no additional actions are necessary. In the process, the screen of your computer will become black for a while several times, and the computer will restart on its own to complete certain installation stages.
Depending on the version of Windows, at one of the stages you may need to select or enter basic personalization settings, network options, user account settings or create a new user account.
As soon as the desktop is loaded, your clean installation of Windows is now complete.
Note.Before you start a clean installation of Windows, think before hand about having drivers for all devices you have, and about a safe place to keep your files. Download drivers and save them to a separate media, and create a backup copy of important information.

How to Install Windows 7 On a Computer or Laptop Keeping Your Programs, Drivers and Data

How to Reset Windows 10 or 8 PC to Factory Default Settings (All Methods)

How to Reset Windows 10 or 8 PC If The Operating System Won't Boot


