- Why Regular Data Recovery Tools Can’t Restore Files from RAID
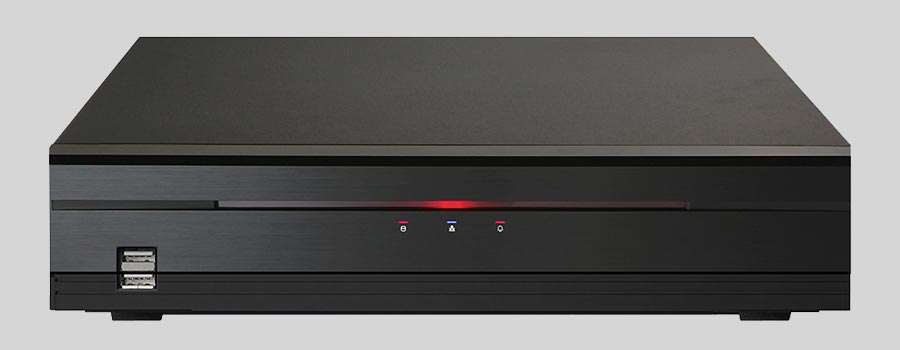
- Key Information About the NAS Idis DR-2216P
- How to Remove Hard Disks from Your NAS and Connect Them to a PC
Why Regular Data Recovery Tools Can’t Restore Files from RAID
Conventional hard drives store user data by writing it sequentially across the disk surface, which means an entire file is typically located on a single drive. In contrast, when data is written to a RAID array, each file is split into multiple fragments. These fragments are then distributed and written in sequence across all the drives in the array. Depending on the configuration, fragment sizes can range from 2 KB to 2 MB, so every file is physically stored across several disks at once.
This approach significantly increases read and write performance — after all, writing two halves of a 1 GB file to two drives simultaneously is much faster than writing the full 1 GB to a single disk. However, this same mechanism makes file recovery far more complex.
Different RAID levels use different methods to distribute and protect data. On top of that, manufacturers like Idis often add their own proprietary structures and variations. As a result, data can be written to disks in many different formats, and each requires a specific approach during recovery.
Are there any specific network security measures to implement for safeguarding NAS Idis DR-2216P devices against data loss?
Yes, there are several network security measures that can be implemented to safeguard NAS Idis DR-2216P devices against data loss. Here are some recommendations:
- Secure Network Configuration: Ensure that the NAS device is connected to a secure network. Use strong passwords for network access and disable any unnecessary services or ports.
- Firewall Protection: Implement a firewall to restrict unauthorized access to the NAS device. Configure the firewall to only allow necessary network traffic and block all other incoming connections.
- Regular Firmware Updates: Keep the NAS device's firmware up to date with the latest security patches. Manufacturers often release firmware updates to address vulnerabilities and improve security.
- Enable Authentication and Access Controls: Implement strong authentication mechanisms such as two-factor authentication (2FA) to prevent unauthorized access. Also, configure access controls to restrict user privileges and limit access to sensitive data.
- Data Encryption: Enable encryption for data stored on the NAS device. This ensures that even if the device is compromised, the data remains protected and unreadable.
- Backup and Disaster Recovery: Implement a regular backup strategy to create copies of the data stored on the NAS device. Store backups in a separate location or on a different device to protect against data loss in case of device failure or physical damage.
- Network Intrusion Detection System (NIDS): Deploy a NIDS to monitor network traffic and detect any suspicious activities or intrusion attempts. This helps in identifying and mitigating potential security threats.
- Physical Security: Ensure that the NAS device is physically secured in a locked room or cabinet to prevent unauthorized access or theft.
- User Education: Educate users about best practices for network security, such as avoiding suspicious links or attachments, using strong passwords, and regularly updating software.
By implementing these network security measures, you can significantly reduce the risk of data loss and enhance the overall security of your NAS Idis DR-2216P devices.
How to Remove Hard Disks from Your NAS and Connect Them to a PC
Although the NAS DR-2216P can be accessed over the network, you still need to remove its hard disks and connect them directly to a Windows PC. Only then can the recovery software properly scan and analyze the drives. Follow these steps:
-
Power off the NAS and disconnect it from the power source.
WARNING! Before removing any drives, carefully read the device manual. Improper actions may damage both the NAS enclosure and the hard disks in the RAID array.
-
Remove the hard disks one by one, gently sliding each drive out of its slot. Remember that hard disks are highly sensitive: any impact or drop can cause serious physical damage.
-
Label each hard disk according to its position inside the NAS. The order of the drives is crucial for correct RAID reconstruction.
-
Connect the drives to your computer. In this video, we explain which ports you can use to connect hard disks and what to do if your PC does not have enough free connectors.
Go to view
Step-by-Step Data Recovery with Hetman RAID Recovery

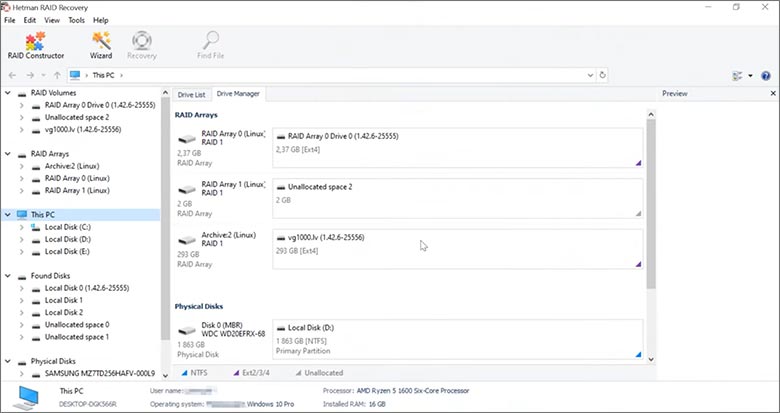
This program restores data from damaged RAID arrays and is fully compatible with Idis DR-2216P. Each hard disk in the array contains technical metadata describing how files were written. When launched, Hetman RAID Recovery analyzes this metadata, automatically reconstructs the damaged array, and provides access to its contents. After that, you can browse the recovered disk and save your files. The program can also restore files that were accidentally deleted from the network drive.

How to recover data from a Idis
DR-2216P has 2 HDD slots, and it supports the following array types:
- RAID 0;
- RAID 1;
- JBOD;
NAS supports:
- exFAT, VFAT, FAT 12 / 16 / 32;
- NTFS / ReFS;
- APFS / HFS+;
- Ext2 / 3 / 4 / ReiserFS / XFS / UFS / ZFS / Btrfs;
- VMFS / HikvisionFS;
How to Safely Recover Data from Disk Images
This utility allows you to create a complete copy of a disk and work with the disk image instead of the physical drive. This approach helps protect your data from:
- Overwriting during the recovery process;
- Additional data loss caused by bad sectors;
- User errors.
To create a disk image, follow these steps:
-
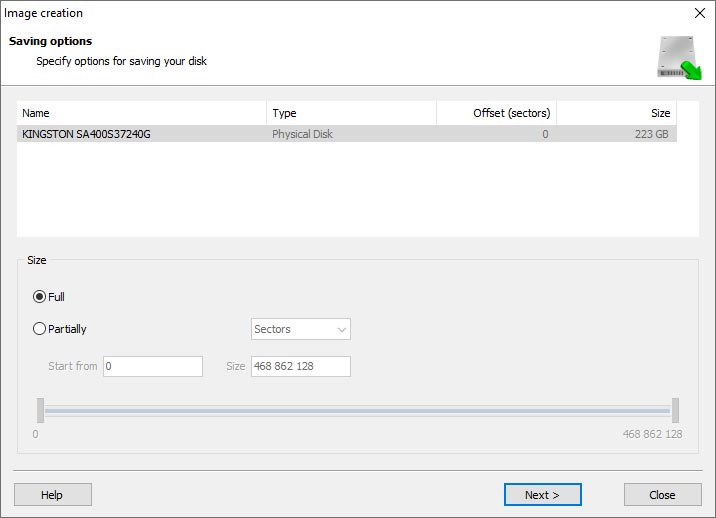
Ensure you have enough free space to store the image. Its size will typically match the size of the original disk.
-
In the main window, select the target disk and choose Tools - Save Disk. You can also select multiple disks if needed.
-
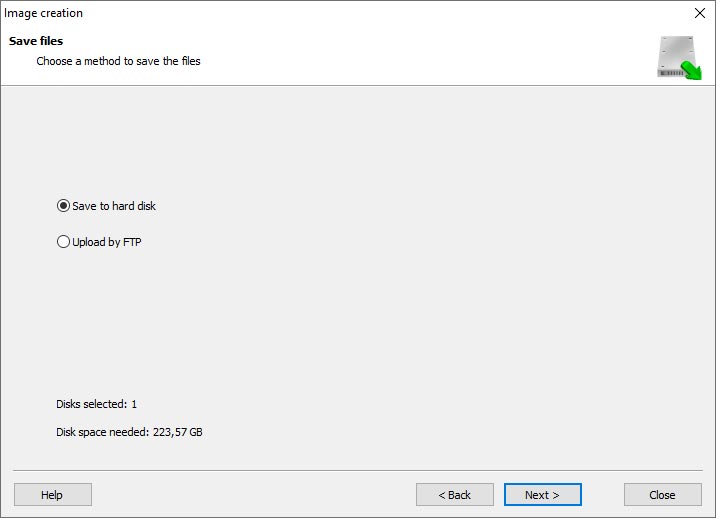
When the Image Creation Wizard opens, select whether you want to save the entire disk or only a specific region. Adjust the settings and click Next.

-
Choose the directory where the image will be saved. You may select any available disk connected to your PC or upload the image via FTP.

Where Are the User’s Files Actually Stored?
The Idis DR-2216P network-attached storage keeps OS Linux operating system files on a separate RAID 1 (mirrored) array. Usually, all NAS systems create several volumes on every hard disk, and the first of them takes up to 2 Gb of space. This is where operating system files are stored. Other volumes are united into a RAID array where user’s data is written.
RAID Recovery Software: Detailed Comparison
| Product | Operating system | RAID controller support | Supported file systems | Virtual RAID controller support | Data recovery from damaged RAID | File preview |
|---|---|---|---|---|---|---|
| Hetman RAID Recovery | Windows, Linux, MacOS | Yes, over 100 controllers | FAT, exFAT, NTFS, ReFS, APFS, HFS+, Ext4, Ext3, Ext2, ReiserFS, Btrfs, VMFS, Hikvision, XFS, UFS, ZFS | Yes | Yes | Yes |
| DiskInternals RAID Recovery | Windows | Yes, over 10 controllers | FAT, NTFS, Ext2/3/4, HFS+ | No | Yes | Yes |
| R-Studio | Windows, Mac, Linux | Yes, over 20 controllers | FAT, NTFS, Ext2/3/4, HFS+ | Yes | Yes | Yes |
| UFS Explorer RAID Recovery | Windows, Mac, Linux | Yes, over 100 controllers | FAT, NTFS, Ext2/3/4, HFS+ | Yes | Yes | Yes |
| EaseUS Data Recovery | Windows | Yes, over 20 controllers | FAT, NTFS, Ext2/3/4, HFS+ | No | Yes | Yes |
| ReclaiMe Free RAID Recovery | Windows | Yes, over 100 controllers | FAT, NTFS, Ext2/3/4, HFS+ | Yes | Yes | Yes |


Yes, it is possible to recover data from a NAS device that has been infected by malware or viruses. However, the process may vary depending on the severity of the infection and the specific measures taken by the malware.
Here are some general steps you can take to recover data from an infected NAS device:
Remember, prevention is always better than cure. Regularly backing up your data and implementing robust security measures can help minimize the impact of malware infections and ensure data recovery is easier in the event of an incident.