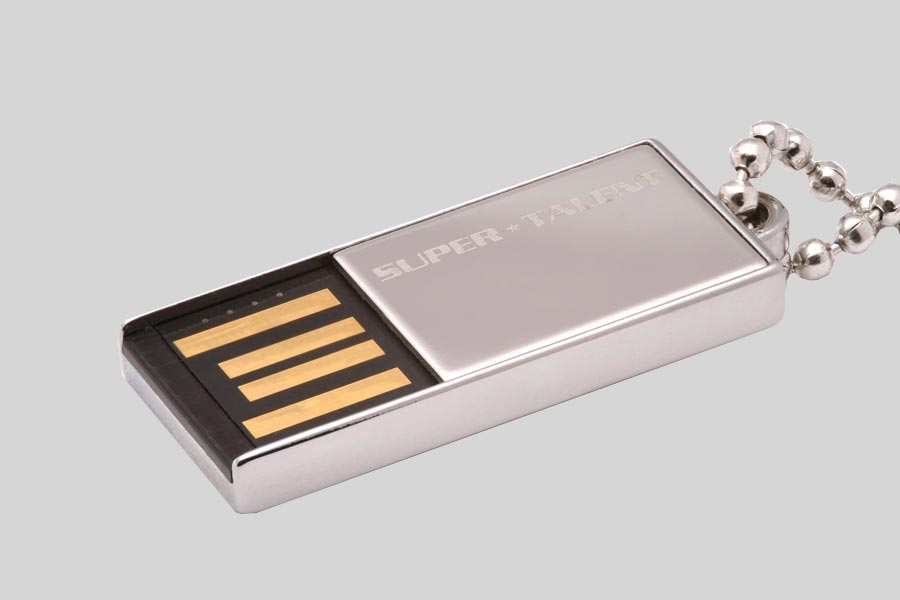
- What are the Common Causes of Data Loss or Failure on a Super Talent Flash Drive?
- The Program For Recovering Super Talent Flash Drive Data
- Recover Data From Super Talent Flash Drive After Formatting or Deleting Partition
- SMART Parameters Of Super Talent Flash Drive
- Restore File System On Super Talent Flash Drive
- Restore Partitions On Super Talent Flash Drive With “Diskpart” Command
- Find Bad Sectors And Errors, Run The Defragmentation
- Repairing Super Talent Flash Drive
- Creating Backup Copy Of Super Talent Flash Drive
If you need to recover an internal or external hard disk (HDD, SSD or SSHD), a memory card or a USB pen drive, the first step is to connect it to a computer. If you want to recover data from a dashboard camera, phone, camera, or a music player, you should remove their memory card and connect it to a desktop computer. Also, you can try this tutorial for internal phone storage, if you connect your phone to a computer and it displays your device in This PC folder as a USB drive.
What are the common causes of data loss or failure on a Super Talent USB flash drive?
- Physical damage: Dropping, crushing, or exposing the USB flash drive to extreme temperatures can cause physical damage to the device, resulting in data loss.
- File system corruption: Corruption of the file system on the USB flash drive can occur due to improper ejection, power surges, or malware infections, leading to data loss or failure.
- Accidental deletion: Accidentally deleting files or formatting the USB flash drive without proper backup can result in permanent data loss.
- Virus or malware attacks: Viruses or malware can infect the USB flash drive and corrupt files, leading to data loss or failure.
- Power surges: Sudden power surges or fluctuations can damage the USB flash drive and result in data loss.
- Software or firmware issues: Software or firmware issues on the USB flash drive can cause data loss or failure, requiring reformatting or repair.
- Age and wear: Over time, the USB flash drive may become worn out or reach the end of its lifespan, resulting in data loss or failure.
- Improper handling: Rough handling or improper use of the USB flash drive can cause damage to the device and result in data loss.
The Program For Recovering Super Talent Flash Drive Data
Are you looking for a way to recover data?
If files have been deleted from a Super Talent Flash Drive, and it is impossible to recover them by using standard tools of your operating system, the most effective way will be to use Hetman Partition Recovery.
For this purpose, do the following:
-
Download the program install and launch it.
-
By default, users are suggested to start with File Recovery Wizard. Click «Next» and the program will ask you to select the disk you want to recover your files from.
-
Double-click on the disk and select analysis type. Choose «Full analysis» and wait for the disk scanning procedure to finish.
-
When the scanning is over, you will be show files for recovery. Select the ones you need and click «Recover».
-
Select one of the options to save files. Do not save the recovered files to the disk from where they have been deleted previously because they can be erased.
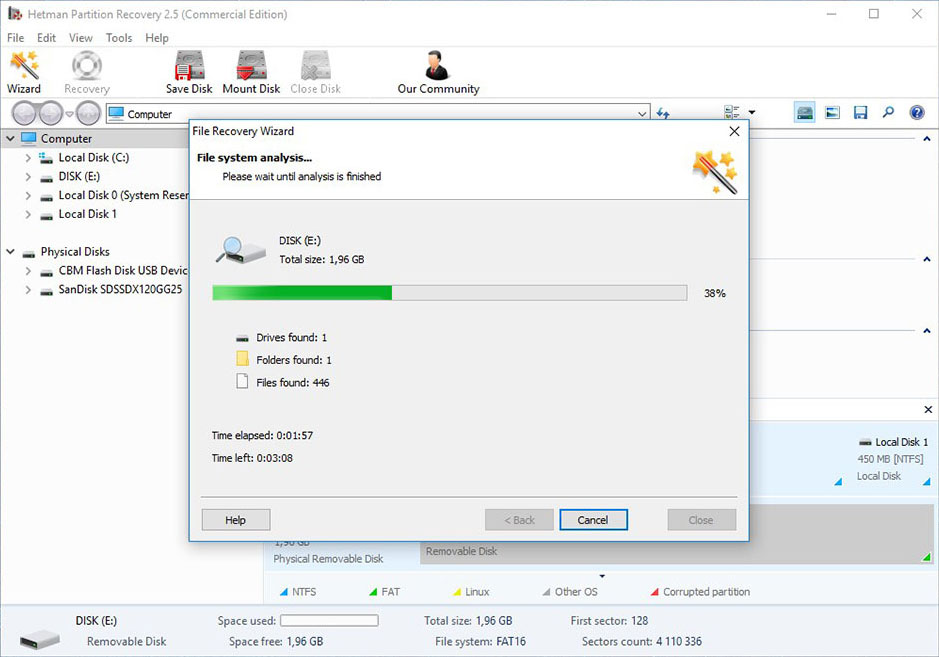

How to Recover Deleted Files With Hetman Partition Recovery Software
Recover Data From Super Talent Flash Drive After Formatting or Deleting Partition
Recover Files After Formatting
Are you looking for a way to recover files from a Super Talent Flash Drive after formatting? Follow this guide:
Download Hetman Partition Recovery, install and launch it. After launch, the program will find and display all physical disks as well as available and unavailable partitions and areas on your disks, showing this information in the left part of the main window.
Double-click on the disk or the area from which you need to recover files and select analysis type.
Choose «Full analysis» and wait for the disk scanning procedure to finish.
When the scanning is over, you will be show files for recovery. Select the ones you need and click «Recover».
Select one of the options to save files. Do not save the recovered files to the disk from where they have been deleted previously because they can be erased.
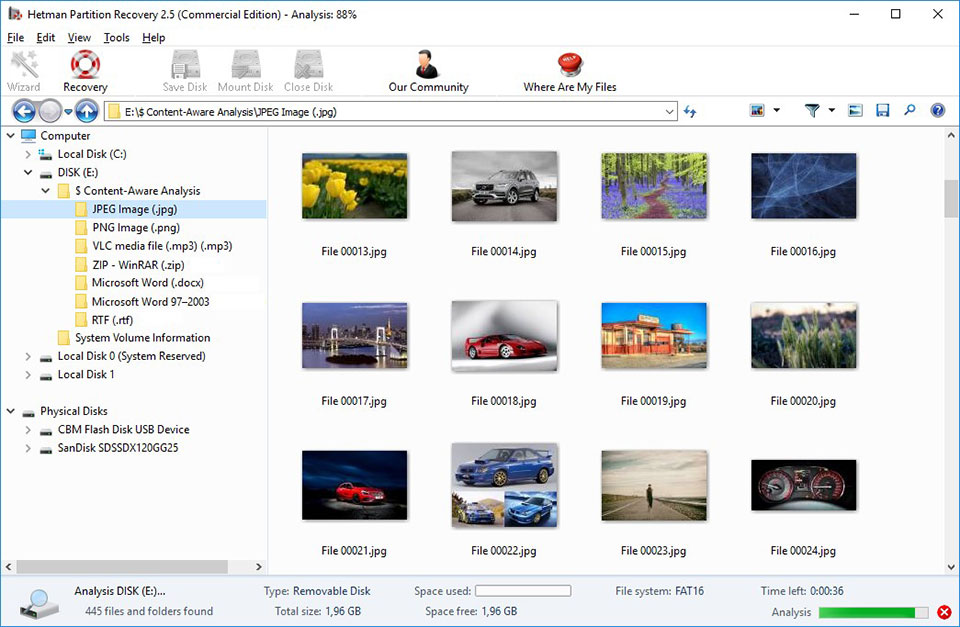
Recover Data From Deleted Partition
Are you looking for a way to recover files from a deleted partition in a Super Talent Flash Drive? Follow this guide:
Download Hetman Partition Recovery, install and launch it. After launch, the program will find and display all physical disks, flash drives or memory cards in the left part of the main window. The list of physical devices is shown after logical drives
Double-click on the device from where a partition was deleted.
Choose «Full analysis» and wait for the disk scanning procedure to finish.
When the scanning is over, you will be shown files for recovery. Select the ones you need and click «Recover».
Select one of the options to save files. Do not save the recovered files to the disk from where they have been deleted previously because they can be erased.
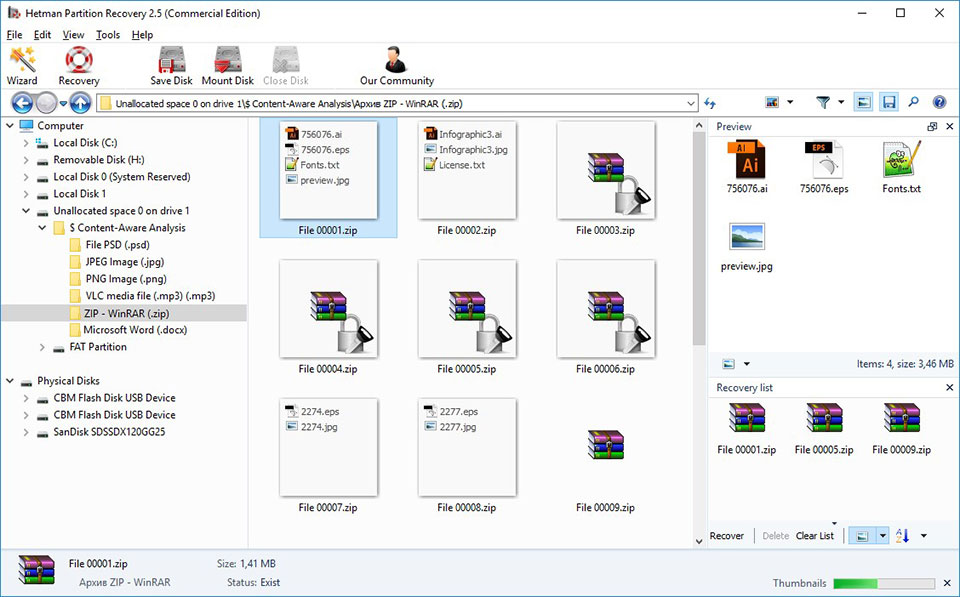
Recover System Partition With LiveCD
If there is no possibility to connect a hard disk with a lost or damaged system partition to another computer, you can recover such partition by starting your computer with LiveCD, an alternative portable version of an operating system. For this purpose, do the following:
Find a LiveCD which is good enough for your needs, download it and copy it to a CD\DVD or a flash drive.
Connect the LiveCD to your computer and turn it on. The computer will reboot automatically with the LiveCD.
Copy files from the system partition to another media (often it can be an external hard disk).
Recover System Partition Data on Another Computer
If the system partition is lost, a computer will not boot. That is why:
Take out of the computer or disconnect the hard disk where the system partition was lost.
Connect this HDD to another computer.
Make sure that your hard disk is recognized by the other computer correctly.
Now, follow the steps as shown in the previous section.

How to Recover Data After Formatting, Deleting or Creating Partitions
SMART Parameters Of Super Talent Flash Drive
Large hard disk manufacturers include S.M.A.R.T. technology into their products. S.M.A.R.T. analyzes a great number of mechanical attributes. This analysis allows detecting hard disk errors before it breaks down completely, and it can also help to find out why it happened.
In spite of S.M.A.R.T. ability to predict future problems, most of them cannot be prevented. Therefore, S.M.A.R.T. is a technology which often warns users of the hard disk nearing its end. S.M.A.R.T. values cannot be corrected and there is no need to waste time on that.
Every hard disk manufacturer sets a threshold value for every operation. Under normal circumstances, threshold values are never exceeded. Otherwise, we encounter errors.
There are 256 values, each having its own ID. Some errors and extreme values are critical. There is no solution for such errors. The only way out for them is to replace the hard disk as soon as such error is detected.
There are no methods to correct critical SMART errors. If the hard disk is not replaced, the error will be displayed again and again. The only justified reason for still keeping the disk will be the need to save data from the sectors which are still available. If the error warning comes true, the disk will become unavailable for any program known. That is why there are steps to be taken to save your data.

How to Use Victoria to Test and Fix Your Hard Disk
Restore File System On Super Talent Flash Drive
If it is impossible to recognize the file system on Super Talent Flash Drive, hard disk, format the device.
File System In Super Talent Flash Drive Is Recognized as RAW
Sometimes the operating system cannot recognize the file system structure (for example, FAT or NTFS). If you check properties of such device, its file system will be identified as RAW. In this case, Windows suggests formatting the disk.
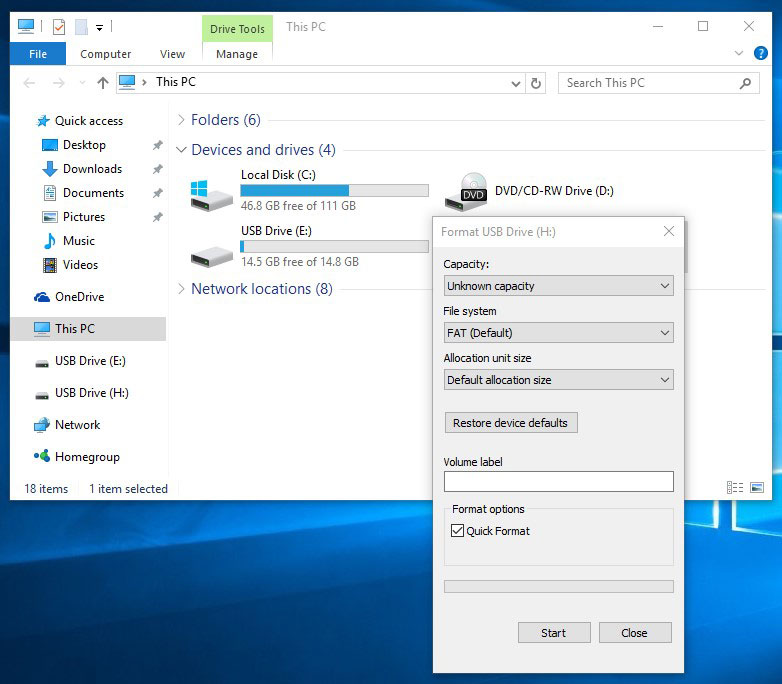
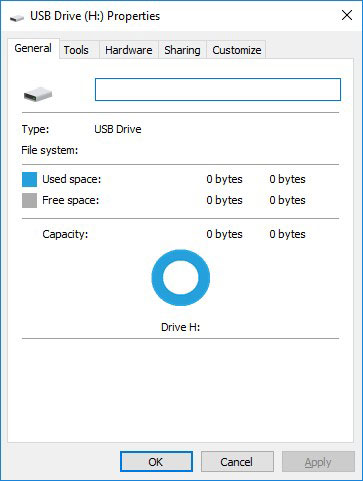
There are utilities specialized in restoring RAW disks, but we recommend using a versatile solution, Hetman Partition Recovery. This function is an additional component, so you only have to launch the program and analyze such disk.

How to Fix Flash Drive Errors: The Drive Can’t Be Recognized, Wrong Size, RAW File System
Run CHKDSK Command
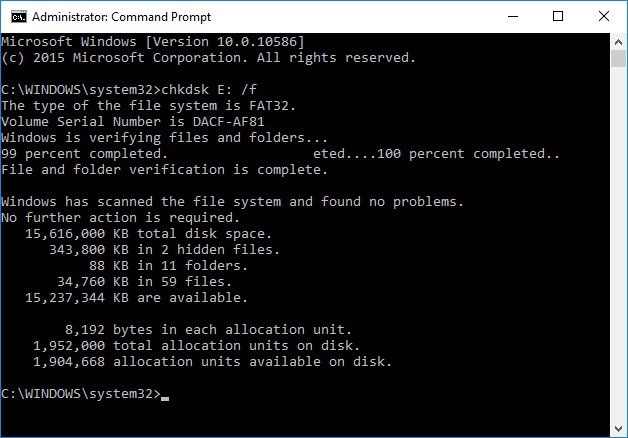
In some cases, the file system on a Super Talent Flash Drive can be repaired with the command CHKDSK.
Launch the Command prompt as Administrator.
Type in the command “chkdsk D: /f” (instead of D: type in the letter of the corresponding disk) and press ENTER.
As you launch the command, the process of error checking and correcting will start; it can help to restore your file system back to normal.

How to Check Your Hard Disk for Errors and Fix Them in Windows 10
Restore Partitions On Super Talent Flash Drive With “Diskpart” Command
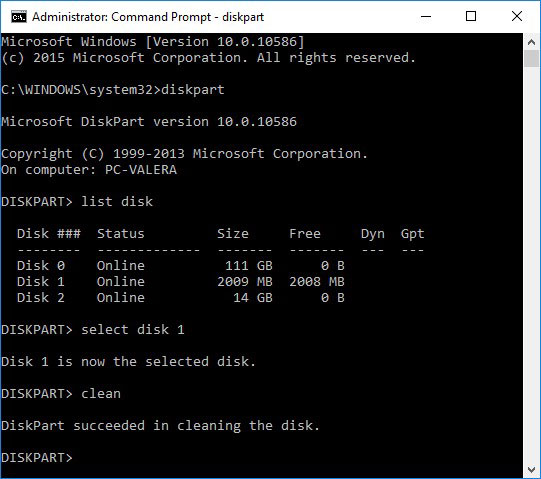
If a USB drive, a memory card or another media work incorrectly, cleaning the disk and its partitions with the command “Clean” and Diskpart tool can become one of the ways to solve the problem. This tool can correct errors if the device cannot be formatted or when its size is identified incorrectly.
Launch the Command prompt as Administrator.
Run the command DISKPART.
Show the list of disks with the command LIST DISK and find the number of the disk which you need to recover.
Select the disk you need: SELECT DISK # (instead of # enter the disk number).
Run the command CLEAN.
Create a partition in the cleaned disk and format it into the file system you like.
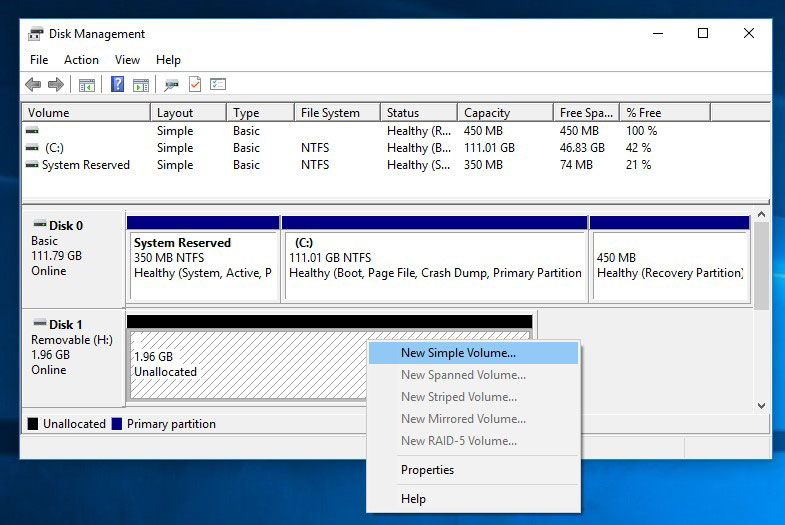

How to Fix Flash Drive Errors: The Drive Can’t Be Recognized, Wrong Size, RAW File System
Find Bad Sectors And Errors, Run The Defragmentation
Scan The Disk For Errors And Bad Sectors Snd Correct Them
Check all partitions of the hard disk and try to correct the mistakes which have been found. For this purpose, do the following:
Open the folder «This PC».
Right-click on the disk containing an error.
Select Properties / Tools / Check now (in the tab Error-checking).
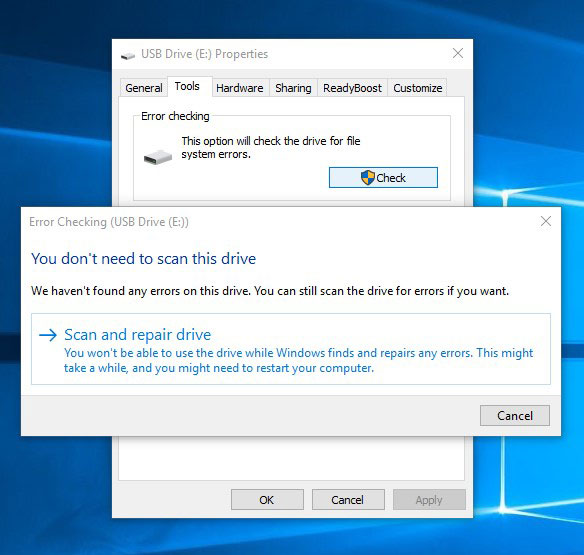
As a result of scanning, the errors found on the disk can be corrected.

How to Check Your Hard Disk for Errors and Fix Them in Windows 10
Run Disk Defragmentation
Open the folder «This PC» and right-click on the disk.
Select Properties / Tools / Optimize (in the tab Optimization and defragmentation).
Select the disk you need to optimize and click Optimize.
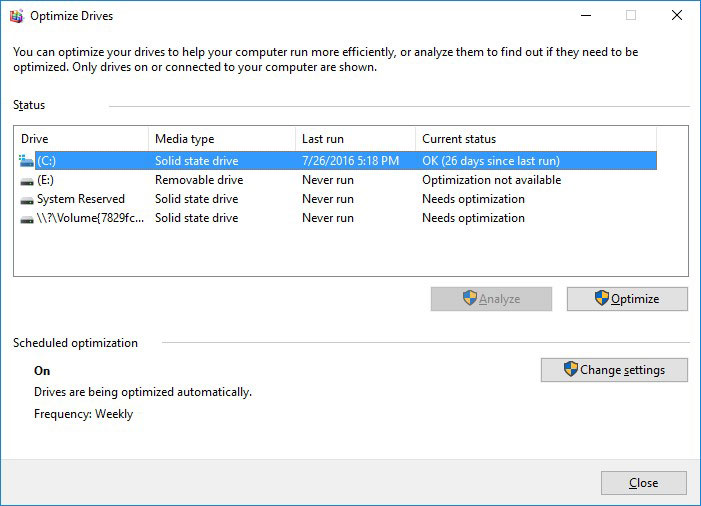
Note. In Windows 10 defragmentation/optimization can be scheduled so that it is performed automatically.

How to Defragment Your PC's Hard Drive on Windows 10
Repairing Super Talent Flash Drive
It is important to understand that any of the ways to eliminate errors in a Super Talent Flash Drive hard disk is only a virtual solution to the problem. Often it is impossible to remove the cause of the error completely, because the device needs repairing.
You can go to a service center to fix the breakage or replace parts/microchips of a Super Talent Flash Drive. Yet in this case the cost of works will be several times as expensive as buying a disk or memory card. So this step is only worth taking if you need to recover very important data.
Creating Backup Copy Of Super Talent Flash Drive
There are several solutions to create data backup copies:
Applications built into the operating system. Microsoft Windows offers methods of data backup that suggest saving files and data to external or intrernal (built-in) media storages. All modern versions of Windows are already equipped the fuction of creating a backup copy of certain files or the entire hard disk if necessary. The functions offered by Windows are comprehensive and self-sufficient, and they are meant to be convenient enough so that you do not go looking for third-party services or software.
Manual backup. You can always use the good old method of creating a backup copy by manually copying the data to an external medium. it is a long process but if you work with small amounts of data, such solution can be acceptable for you.
Online services. Recently the most up-to-date way of data backup is becoming popular, represented by numerous online services. These are companies that provide backup for your files right on the Internet. A small background application installed on your computer creates copies of thnecessary data and saves them to a remote server. However, the space allowed for storing files in a free version is too small to use this method as a complex solution. Often this space is under 10 Gb so there is no way to create a backup copy of the entire hard disk. Such services are more practical when things come to backing up a series of files.
Creating a disk image. This is the most comprehensive solution to create a backup copy which is preferred by advanced users. This method suggests using a third-party program to create a backup copy of the entire disk which can be used on another information-carrying medium if necessary. With this solution, you can get access to all data which was there on the disk at the time of copying - documents, software and media files - within a short period of time.

How to Set Up and Configure File History in Windows 10, 8
Models Flash Drive Super Talent:
- Express;
- Pico;
- SuperCrypt;
- DataGuardian;
- Nickel;
- Elite;
- CKB;
- M1;
- RM;
- RM2;
- Eco Swivel;
- CSB;
- TSP;
- CTS;
- SSP;


